Showing posts with label Altered Stuff. Show all posts

Monday, January 2

Holiday Plate Stacker Snack display

Isnt this the greatest find???  It's 1960s, made from plastic plates, missing one, but appropriate hardware for 3 stacking plates!  I found this on The American Homemaker's Etsy Shop... who knows where she found it!


This is how it arrived.  I had asked her to package it in pieces for easier tranport.  The plates had a 1/4 inch hole drilled into them.  First task:  secure new plates and a 1/4 inch drill bit that could drill through glass/ceramic.
And this is what became of it:


The process started by marking out the centers of the plates and drilling small pilot holes.
It continued with the glass and ceramic drill blade which is best used with water.

One with a hole, 2 more to go.
As in all projects involving the husband, beer and a 2nd plate with the hole drilled.

Then it was just a matter of assembly...
Which was had a few issues since our plates were heavier and thicker than the original ones, but it turned out perfectly!


She has quite a variety of retro and vintage items.

Photobucket

Saturday, August 14

Sometimes you just Gotta Bling!

Seriously, is there anything you can't bling up or alter??? First, this $5, 9" battery operated clock... a gift from Jill K, my previous CM upline. Isn't it adorable how she took some simple stickers and die cuts and made this clock look great!!

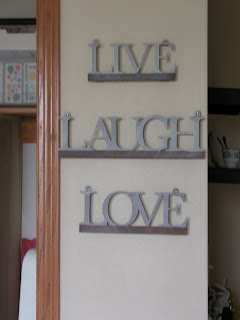
And then this metal sign I found at Hobby Lobby... $10 with a 50% off coupon... cost me $5 and about 2 foot of ribbon.


I have had these signs for 6 years. They were high decor in my previous house, but they hadn't fit in here until I took a can of spray paint to them.

I love them once again!!!


Sure, we are all talking about decluttering and tossing stuff, but every once in a while you really can just redecorate or repurpose stuff.


Photobucket

Tuesday, February 24

Cute File Folders Tutorial

A couple weeks ago I posted on Organising Queen -as part of my office makeover- this photo of my action file folders.

They were super wasy to make! I spent less than 5 minutes on each!

Supplies:

  • Manila file folder
  • Adhesive
  • Scissors
  • Decorative paper or fabric
  • Embellishments

I took my cheap-o file folder and some scraps of paper . For the tab section of the file, I cut a strip 2.5" wide.

I ran adhesive around the exterior of the strip as well as down the middle.


When I flipped it over and stuck it down, I quickly trimmed around the tab.

I followed the same procedure with a larger piece of paper for the front, trimming when it was adhered.
Then I embellished with Ribbon. Lastly, I stuck a label on each folder.
Poof! Cute Folders!


You can match them to your decor so that you don't mind having them out in the open. I went one step further than that with my BILLS TO PAY folder and covered it with Chocolate paper... hoping to make paying the bills slightly more palitable. *giggle*

What do your action folders look like??

~Anne

Tuesday, November 11

Terrific Tuesday!

Lookie what I found!


This was getting thrown away at work so I rescued it from certain destruction! It has to be 30 years old (at least) and is thick and heavy metal. What will I do with it? Will I turn it into a scrapbook? Will I fill it with first aid stuff and toss it in my trunk? Will I find another use for it? Hmmmm. What WILL I do with it? So many ideas, only one box.

And look at this!


It originally looked like this:


It was so plain and ugly and plastic. I took a bit of paper and glue... and spiffed it up a bit!

What do you think I will use it for?

Hint: It is magnetic.

Come on! Play along! First one to guess correctly will get a special package from me....

~Anne

Thursday, July 10

Box of Goodies for Mom!

On Monday I talked about the box from OT that I pilfered so I could send some stuff to my mom.... and I thought I would share some of the goodies with you!

First, I dug through my cards and sent her a handful. I know some of these came from a card swap a few years ago. I would love to give credit where due, but unfortunately they weren't well marked. The ones made for that swap were all amazing!
I also sent her an altered lunchbox. I dont know what she will choose to put in it, but I used her favorite color and every purple paper with flowers I could find! I kept the front of it simple since I wasnt sure how she would use it... maybe photos of the grandkids, recipes, craft ideas, gardening stuff?
I also included a set of notecards (bad photos, sorry. I didnt check them until the box was already mailed) for my neice who recently married. This was a quick and easy idea from Dannie Graves.

I need to work on a box of stuff for my best friend, Mia. I will update you as I get that done!
~Anne

Monday, July 7

Friends Altered Lunchbox


Confession! I totally CASEd this lunchbox from Katie Tate! A couple years ago I bought a CD of ideas from Katie's EBAY store... then I went back and bought a boys lunchbox (Snips n Snails). Then I ordered lunchboxes from Oriental Trade. I even bought the Cherry Pie papers! I was so psyched to make lunchboxes of my own! So why-oh-why did the box from OT sit in my front coat closet for 2, maybe 2 and a half years????


Well, I recently cleaned out the coat closet and found them. Then I found the papers when I organized my scrap supplies. THEN I used the box they came in when I wanted to ship some stuff to my mom. The lunchboxes? They sat piled on my printer waiting to be put to use. Oh, they werent lonely up there! There was a tin that once held the SU! Terrific Tag set as well as a few Altoids tins I have been saving. Yep... nothing lonely about that!

I had even called my teenage daughter to join me in making lunchboxes one day. But she got somethhing done and I just sat there and watched her. UGH. Was I never going to get them done??


The other day I finally worked on them!!!!!!!! This one is going to go next to the phone for numbers for my kids' friends. I have to work on the inside cards. I think I will use a photo of the friend for one half and the contact information on the other half.


I started with the outsides (Modge Podge -my daughter did it for me and put the front paper upside down -oops!) and ribbons (6-7" long each) then worked on the cards (7" x4" with tabs from the SU! Rounded Tab punch)


I had a tiny scrap of the Cherry Pie paper left that I used to cover a kitchen magnet to make a bonus! I have been bummed lately about the number of dirty dishes on the counter because no one is sure if the dishwasher is clean or dirty -- and you KNOW no one bothers to ask. So now when the clean dishes are emptied, the magnet goes on and stays until the dishwasher is set to run. Cool!

Stay tuned! Another lunchbox is coming later in the week!

~Anne

Sunday, July 6

Stop me before I Alter everything!

I have fallen in love with Altered Items! My scrap supplies are not safe until they have been covered...

Here is a set of cardboard magazine holders I got on clearance at Office Max for $3... I used SU! DSP and MonoAdhesive. I think they need some stamping on the labels.... or maybe I should print them and then stamp them. I dunno yet quite what they are missing. Ribbon?
And this was an old photo box. Old and worn and ugly. Luckily I had Cherry Pie papers left over from my Friends Lunchbox project so I grabbed the Modge Podge and covered the tops to two of the boxes. I used three layers of MP on top to give the paper a shine. I tossed in a coordinating label and VOILA! Prettier boxes! Who knows what I will MP or label next!

~Anne

Thursday, July 3

Sketch Rolodex

Three weeks ago Corrie on Scrapbooking Classes posted a link to Carrie’s sketch rolodex.


I was enthralled by her idea and the next day (my birthday) I went to 3 stores to find the one with the BIG 3x5 cards (WHY doesn’t anyone carry them???). I ended having to order it and luckily was able to get it the next day. I had been keeping sketches in a binder and while I used them, it was inconvenient and there was no rhyme or reason to the way they were printed and tossed in there. Most of the time I found myself searching my computer files for a sketch and then printing yet another copy to use rather than using my binder. The rolodex is the perfect solution! I pulled out my scrap pile and used scraps from my favorite printed papers. I absolutely love the way it turned out! I used scraps of papers that I love to cover the dividers and then started to work on filling it.


I used Carrie’s idea to sort the sketches by number of picture per sketch and included a section for cards too. Look at it now! It is getting so full that by the time I have all my sketches in it I will have to buy another one just for the cards section. I have found myself sitting at my desk spinning it around just to look at my handy work. It is so cool it makes me giddy. (Yes, I know that makes me a geek.)


~Anne

Popular Posts


Grab My Button!
(copy/paste into your own
website or blog):

Pixel of Ink

Pixel of Ink

My Daily Reads